HELPFUL ARTICLES OF INTEREST
Turbocharger & supercharger diagnostics
Naturally aspirated engines found in today’s vehicles can be classified as highly volumetric efficient due to advancements in engine design and engine controls. Many of these advanced features have been appearing over the years. Examples are variable length intake runners, variable camshaft timing, cylinder head design and so on. The overall goal is to make the engine as volumetric efficient as possible across a wide operating engine RPM range. For review, volumetric efficiency (VE) is the measurement of the engine’s ability to pump its displacement. For example, say you have a two-liter engine. If that engine were able to achieve 100 percent VE it would be able to move two liters of air in and out of the engine while at a certain RPM. This RPM would also correlate with the point at which the engine produces the maximum amount of torque. Some modern, naturally aspirated engines can come close to 100 percent efficient, but it’s rare. An excellent engine design would offer a volumetric efficiency beginning at very low engine speeds, up to near redline. To make more torque, all one would need to do is build a bigger engine.
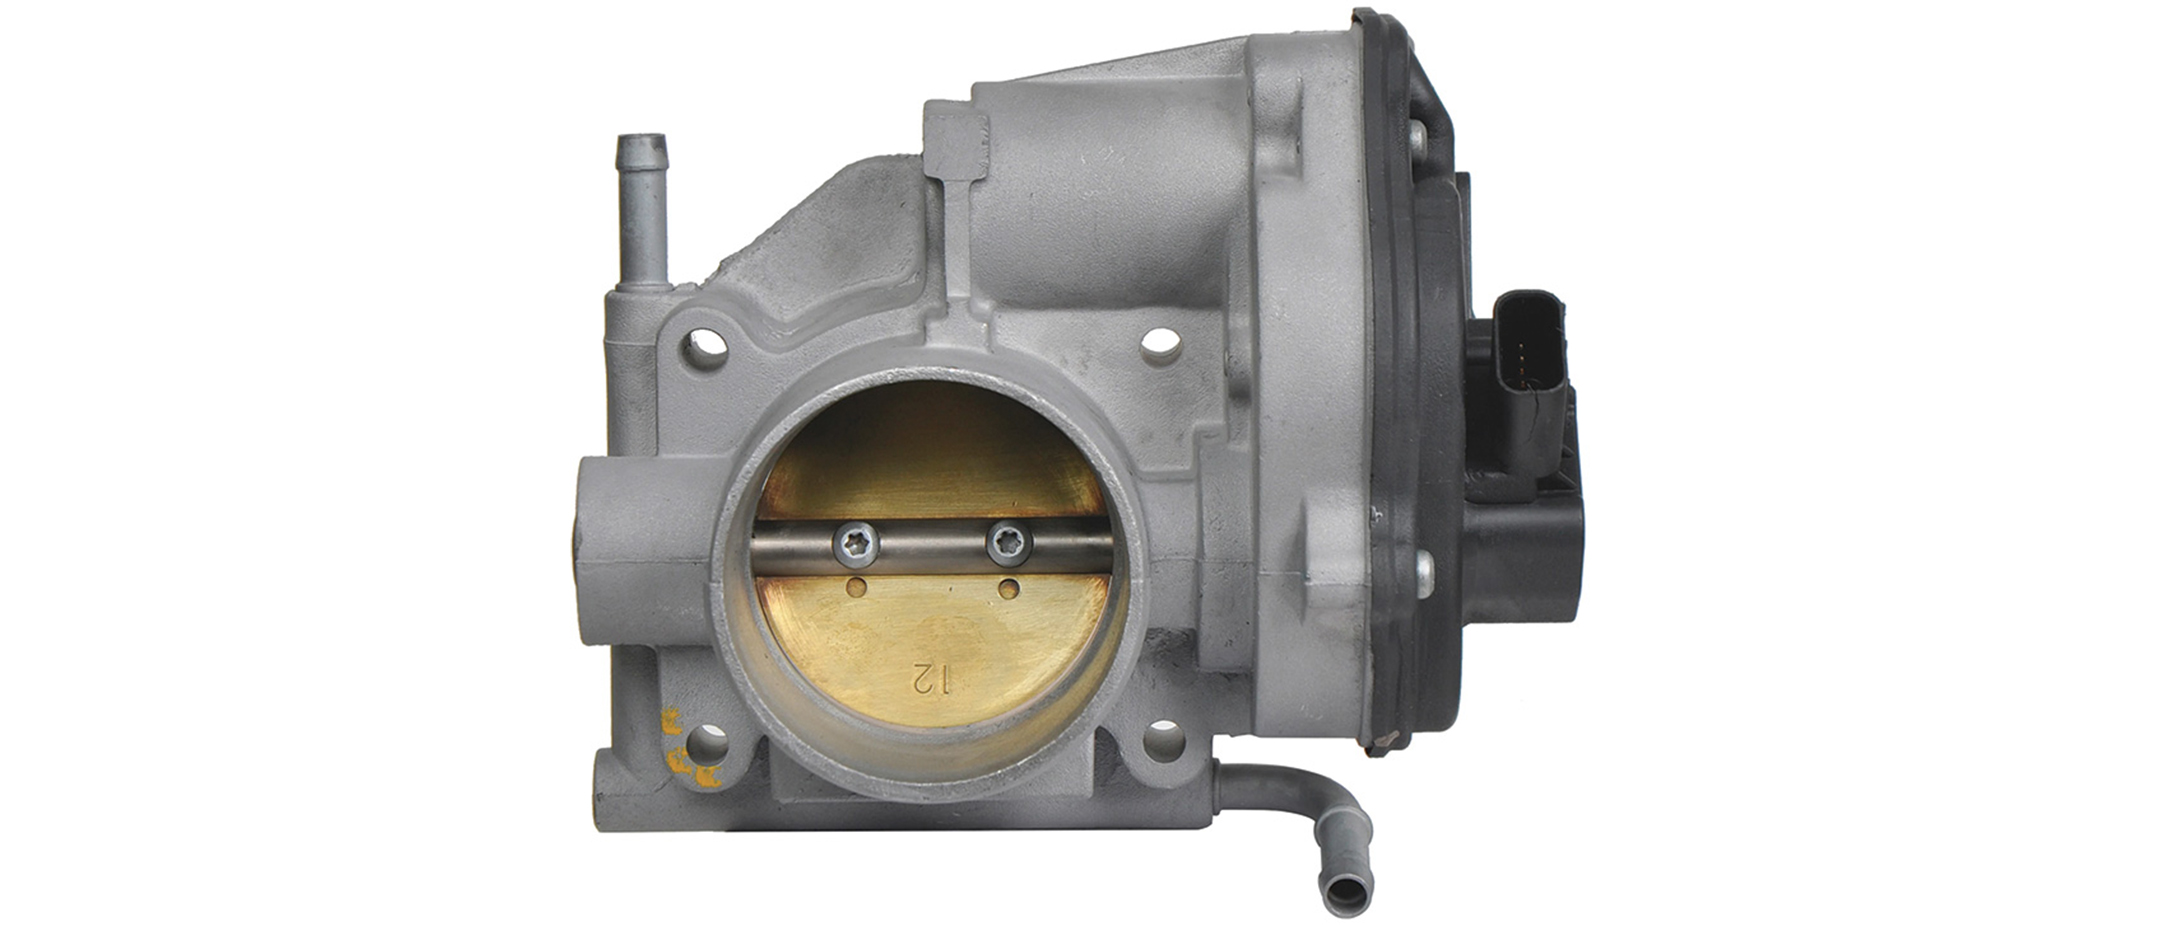
Throttle Body and Throttle Pedal Diagnostics
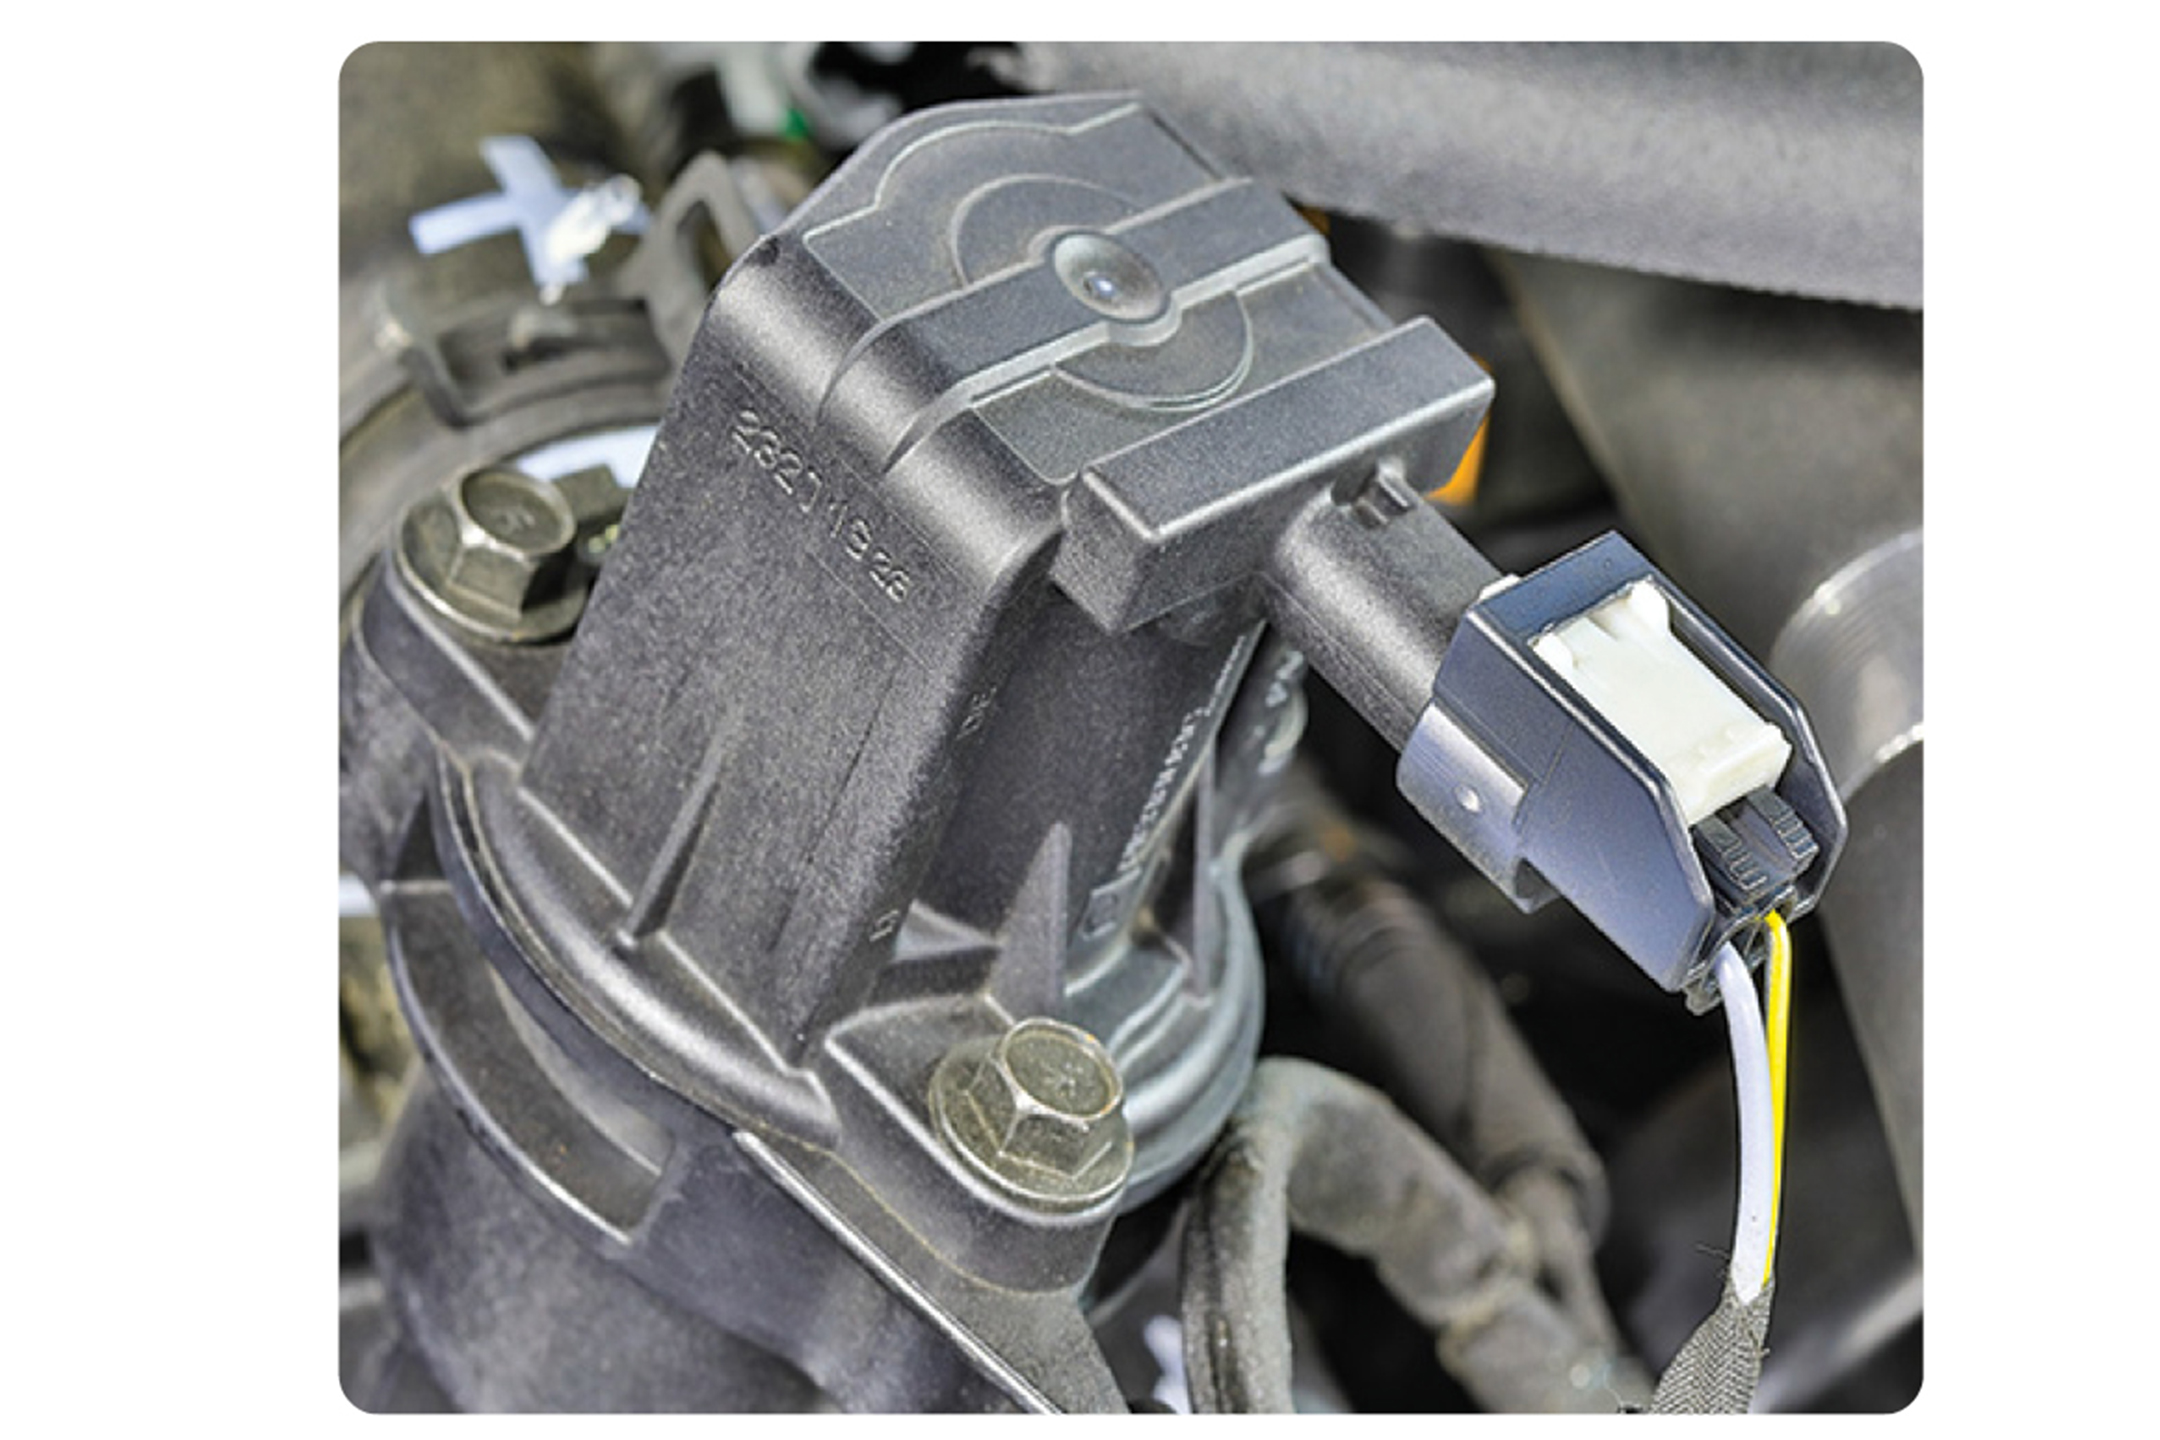
Unlike some other drive-by-wire systems, modern Ford models have one extra signal that the engine controller uses to monitor the driver’s intent. Originating from the throttle pedal, three signal inputs are monitored for rationality. Here, we explore this based on the following condition: 2005 Ford Freestyle with a 3.0L engine surge while driving.

Lincoln Aviator: Showcasing next-level tech in style
Keeping up with changing automotive technology is a full-time job. Seeing what’s being introduced by OEMs now can help prepare you for knowing what training you’ll need to plan for down the road. Take a look at some of the high-tech features on the 2020 Lincoln Aviator luxury SUV. This is the kind of technology we’re sure to be seeing more of in the service bay in the years ahead.
-
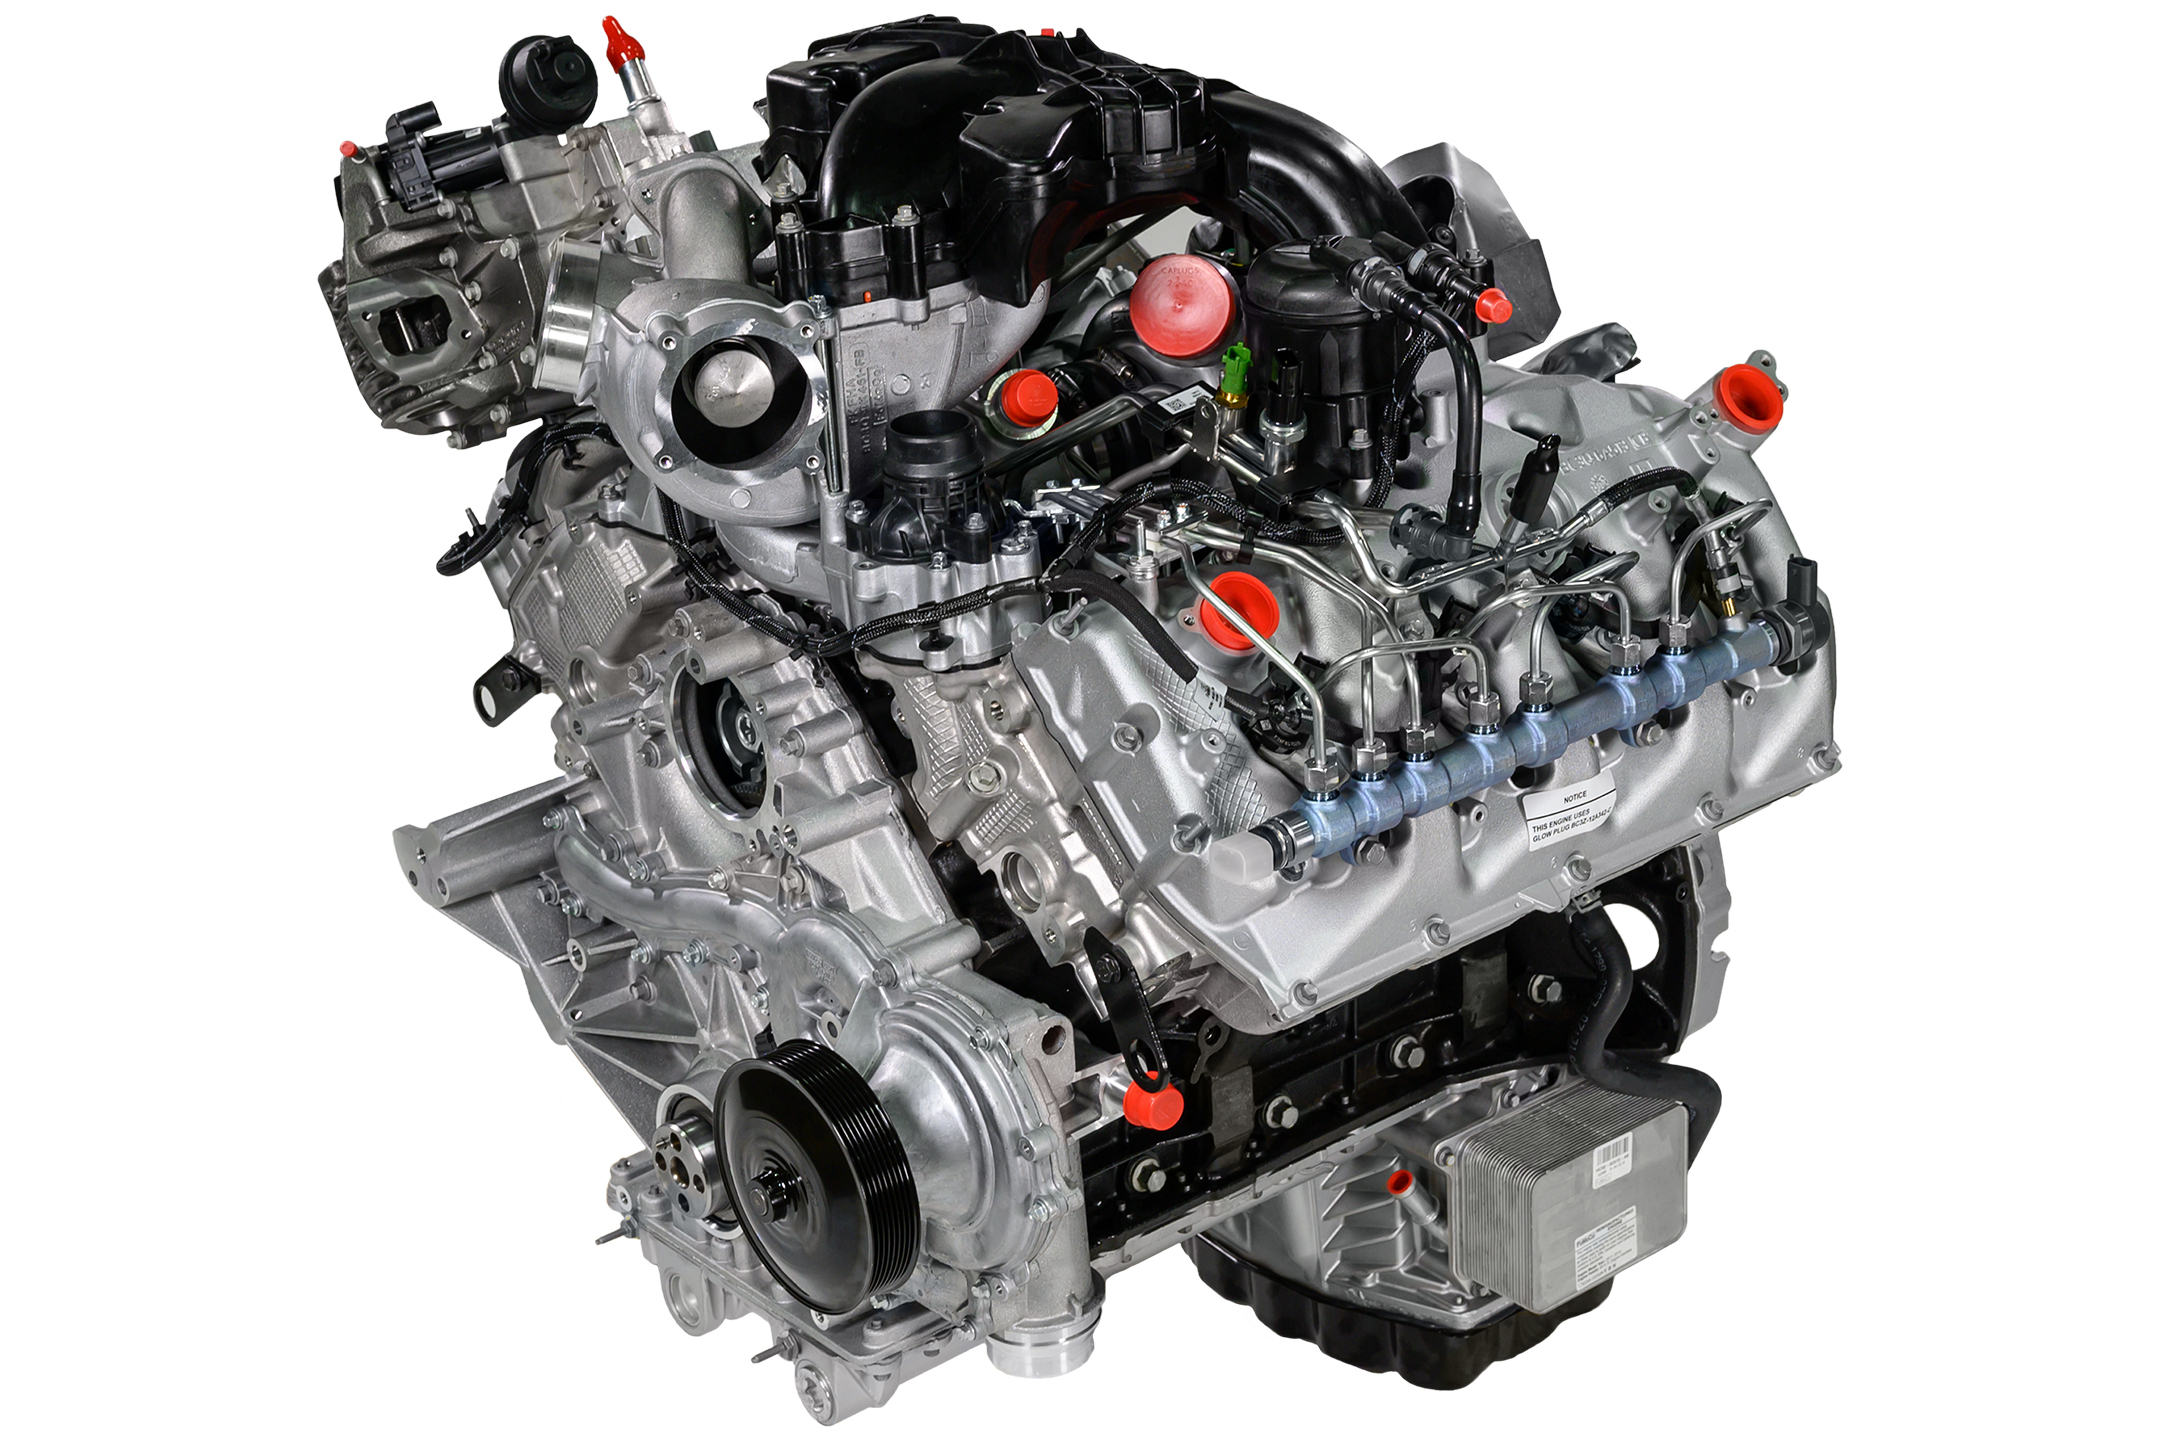
Keeping the 7.3L Power Stroke® Diesel engine going strong
The Power Stroke® 7.3L was the go-to diesel engine in Ford trucks and vans from the mid-’90s to 2003. For some, it’s an experience of fluids mixing, fuel leaks and no-starts. For others, it’s a super-reliable powerplant that seldom needs more than routine maintenance. Let’s take a look at some of the more common service issues and some easy ways to diagnose and fix them.
Ford has always had a reputation for having a strong and reliable line of trucks. This clout was maintained with a diesel engine option available in trucks and vans rated 3/4 ton and up. The 7.3L Power Stroke® made its appearance in Ford trucks starting in 1994 and kept them running strong until 2003 when it was replaced by the 6.0L Power Stroke®. Some have suggested it was replaced for emissions standard changes, and some say it was because of the noise level. Whatever the reason, with about 2 million units sold, this is a very familiar engine to technicians wherever trucks are repaired. Considering these engines are capable of reaching high mileage without breaking a sweat, we will undoubtedly continue to see them in our shops for many years to come.
Engine performance on these beasts of burden is somewhat tame when compared to its modern replacements but that’s not necessarily a bad thing. This means the 7.3L is much less likely to burn up drivetrain components, turbochargers or other engine components. When compared with its contemporaries, the power, durability and ease of repair make it the superior engine. A truly mind blowing feature of the 7.3L is the lack of emission control devices. There’s no EGR and sometimes, on the early models, not even a catalytic converter. The internal engine components are also way overbuilt, making this a popular engine to hot rod. Earlier models had forged connecting rods that could easily handle twice the stock horsepower. Some later engines switched to powdered metal connecting rods that would still handle significant power boosts.
One of the most unusual features of the 7.3L (and later the 6.0L Power Stroke®) is the way it handles the direct-to-cylinder fuel injection. Rather than use a high-pressure fuel rail it uses a high-pressure oil system to boost the fuel pressure right at the fuel injector. The oil pressure in the system can reach 2800-3000 psi that, when amplified in the injector, results in fuel entering the cylinder at up to 18,000 psi. With this much pressure the injector nozzle will simply wear out over time. Around 200,000 miles this wear on the nozzles can alter the spay pattern enough to affect efficiency and make cold start-ups more difficult. Of course, the first test with a long-crank cold start should be checking the glow plug function. But after that, it’s important to consider the age of the injectors. The 7.3L is not a particularly hard-to-start engine. Long crank times may indicate worn injectors that need to be replaced or rebuilt.
This injection system, designed by Caterpillar®, is called the Hydraulically actuated Electronically controlled Unit Injector (HEUI) system. At the front of the engine, under the fuel filter housing, is an engine-driven high-pressure oil pump. Oil pressure output is controlled by the Injection Actuation Pressure (IAP) control valve at the pump, and is monitored by the Injector Control Pressure (ICP) sensor on the side of the head at the high-pressure oil rail. The high-pressure oil is directed to the top third of the injector where it is controlled by an electronically actuated poppet valve. The oil then presses on an amplifier piston (oil side is six times bigger than the fuel side) that presses a plunger in the low pressure fuel side (lower third of the injector), providing greatly amplified fuel pressure at the injector nozzle. Although it may sound complex, it is the most complex aspect of this engine and it has very few failure points.
The most common service issues in the HEUI fuel system are the seals on the fuel injectors, the ICP sensor and the IAP control valve. The fuel injectors will eventually wear out, and high pressure pumps can fail, but this is much less likely than failing sensors and leaking seals. Fuel injector seal leaks will usually manifest in oil mixing with the fuel. Since the oil pressure at the injector is many times higher than the fuel delivery pressure, oil leaking in the injector will push backward through the fuel pump and can even contaminate the fuel in the tank. Reseal kits are available, but if the engine is nearing 200,000 miles it might be wiser to replace the injectors to restore some lost performance from worn or dirty injector nozzles. ICP and IAP problems will typically result in setting Diagnostic Trouble Codes (DTCs) that can be diagnosed electrically. The more common failure is the ICP sensor, and its symptom will be a long cranking hard start or no-start condition. Simply unplug the sensor and try to start the engine. If it starts immediately, you likely have a failed sensor. You can also look at the sensor connector. Much like a failed oil pressure sensor (which is really an oil pressure sensor), the ICP will often leak when they fail.
Electrically testing the fuel injector should be done with caution. The Injector Driver Module (IDM) supplies 115 VDC to the injectors so piercing wires and testing directly is dangerous and should never be attempted. The first test to perform is the KOEO injector buzz test. By activating the test with a scan tool, all of the injectors will buzz for two seconds, then each injector will buzz in numerical sequence for about a second each. Simply listen for any injectors that fail to buzz. The next test will be to remove the valve covers and directly test the resistance of any suspect injectors. Anything outside of 11-18 Ohms means it’s time to replace the injector. When removing the valve covers, you’ll also notice another unique feature (and common failure point) of the 7.3L. The wire harness for the glow plugs and fuel injectors is actually built into the valve cover gasket. It’s important to test before and after the gasket/harness as it has been known to fail electrically.
All of the Power Stroke® 7.3L engines are turbocharged. The turbocharger increases power, efficiency and greatly reduces the negative effect of altitude on engine performance. The units are made by Garrett and have subtle differences through the years. All of them are fixed geometry and that means fewer moving parts. Early models don’t have a wastegate or even an intercooler and later models added the wastegate, intercooler and an Exhaust Back Pressure Valve (EBPV) to increase efficiency in warming the engine up. Problems with the turbocharger are rare, but the bearings can fail. Bearing failure will typically manifest in significant amounts of noise. Don’t be too quick to condemn a turbo if you find oil in the intercooler pipes. There is a PCV system that will ensure you will always find some oil in the intake. Ford has a warning in the manual that indicates seals will not typically fail without a bearing failure and that you shouldn’t replace a turbo for an oil leak on most models. One relatively common turbocharger problem you might run into is when the EBPV sticks closed. Symptoms you might notice would be a lack of power at higher RPM accompanied by an increase in noise like a jet engine. In some models the EBPV is optional and is part of the “cold weather” package. By the early 2000s the EBPV was standard on all 7.3L turbos.
Cold starts are often a big concern for diesel engines. The way diesel fuel burns it inherently makes them difficult to start cold. The primary way to overcome this is by putting an electric heater in the cylinder (called a glow plug) to pre-heat the cylinder and help atomize the initial fuel charge. When you turn the key on you will notice a light on the dash stating “wait to start.” This is indicating that the glow plugs are warming up. A problem in the glow plug system will typically manifest in colder temperatures with a long crank time and loads of white smoke. Often, if the glow plugs aren’t working properly, the engine simply won’t start.
Your first test is checking the glow plug relay “ON” time. The amount of time the relay stays engaged is determined by the engine oil temperature. Below freezing this can be up to 2 minutes and over 90 degrees it might turn off immediately. A lower than expected “ON” time indicates an open circuit or failed glow plug. Testing involves unplugging the connector at the valve cover gasket and testing resistance through each glow plug circuit to ground. The reading will be different depending on the engine temperature, but each glow plug should have a similar resistance and they should be between 0.1-2.0 Ohms resistance. Open circuits will require removing the valve cover to test the connector and isolate the glow plugs. As a shortcut, you can use a conventional test light (incandescent bulb) connected to battery positive and check for light at each glow plug connection at the valve cover. Do not back-probe for these tests as it will absolutely skew your results. When the relay doesn’t come on at all, it’s time to test the relay. These relays are similar to the fender mounted starter relays and they will fail in a similar way. Test for power on the two large posts. The covered post is battery positive, and the uncovered should be hot when the relay is engaged.
An often-neglected component in diesel engine maintenance is the fuel filter service. The filter is due as often as every 15,000 miles under severe duty. That’s more than twice as often as a gasoline engine. The 7.3L Power Stroke® has taken this chore and made it about as easy as it can be. The filter housing is under the engine cover, front and center. On the back of the filter housing is a bright yellow lever to drain the filter before opening it up. The output of the drain is on the front of the engine block about halfway down on the right side. Simply connect a length of hose and a catch can underneath it and open the lever to drain the fuel and any water from the filter housing. This is also a great way to take a fuel sample without opening the filter. When you do open the valve be sure to double check, after your repair, that the fuel isn’t continuing to leak from the pipe.
The filter is removed by unscrewing the plastic cap. Early models simply use a screwdriver across the cap for leverage, while later models have a half-inch drive socket fitting in the cap for easier removal. On a side note, be sure and check the heating element in the fuel filter housing when you get the filter out. The wire arching around the middle is a heating element. Should it become corroded and break it can short out, blowing the #64 fuse in the central fuse block and ultimately leading to no-start due to the loss of key on power at the PCM. Conversely should you find fuse 64 burnt, check the fuel bowl heater before you replace the fuse and call the repair complete. Once you’re ready to reassemble, close the drain valve and have an assistant cycle the key on to fill the filter housing to about 1.5 inches from the top. If it’s too high it will overflow and make a mess when you put the new filter in. Too low and you might suck air into the fuel rail. On assembly, apply a little diesel fuel to lubricate the gasket, then carefully tighten the cap down. There isn’t a tightening specification other than “until the housing is just making contact with the gasket” so making it very tight isn’t necessary — just snug. Once again, double check that you have no leaks when the job is done.
One last simple tip that might save you some big headaches is in diagnosing a possible camshaft position sensor (CMP) failure. It doesn’t happen all that often anymore thanks to an improved sensor design, but CMP sensors can occasionally fail. Since this engine doesn’t use a crankshaft position sensor, the only RPM signal is from the CMP. If it isn’t working the engine won’t run and neither will the tachometer. When you have a cranking no-start, take a quick peek at the tach. If it doesn’t move or jumps intermittently, suspect and test the CMP sensor. The sensor is mounted between the water pump and crankshaft pulley just to the right side. It picks up its signal using an exciter ring on the cam gear. There have been a couple updates to the design of the sensor to improve reliability. You can check FSA 07S57 to see if your specific application applies. This is a great example of when to use a genuine Motorcraft® part. The original is black with a gold colored bracket. If you’re using an aftermarket part, you may not know what the color scheme is. (NOTE: Aftermarket parts may not use a color scheme, so you may be using an old design.) The replacement part with improved reliability is gray with a sliver bracket. To test the sensor, look for 7.5 volts between the yellow wire at the sensor and ground, and a frequency of 130 Hz at idle and 500 Hz at 2500 rpm. Due to the difficult location and the necessity of the engine running to test, it might be better to “test” by swapping in a known good part.
The 7.3L Power Stroke® is a prime example of a balanced powerplant that’s straightforward in its design, strong, reliable and comparatively easy to maintain.
Motorcraft® and Power Stroke® are registered trademarks of Ford Motor Company.
-
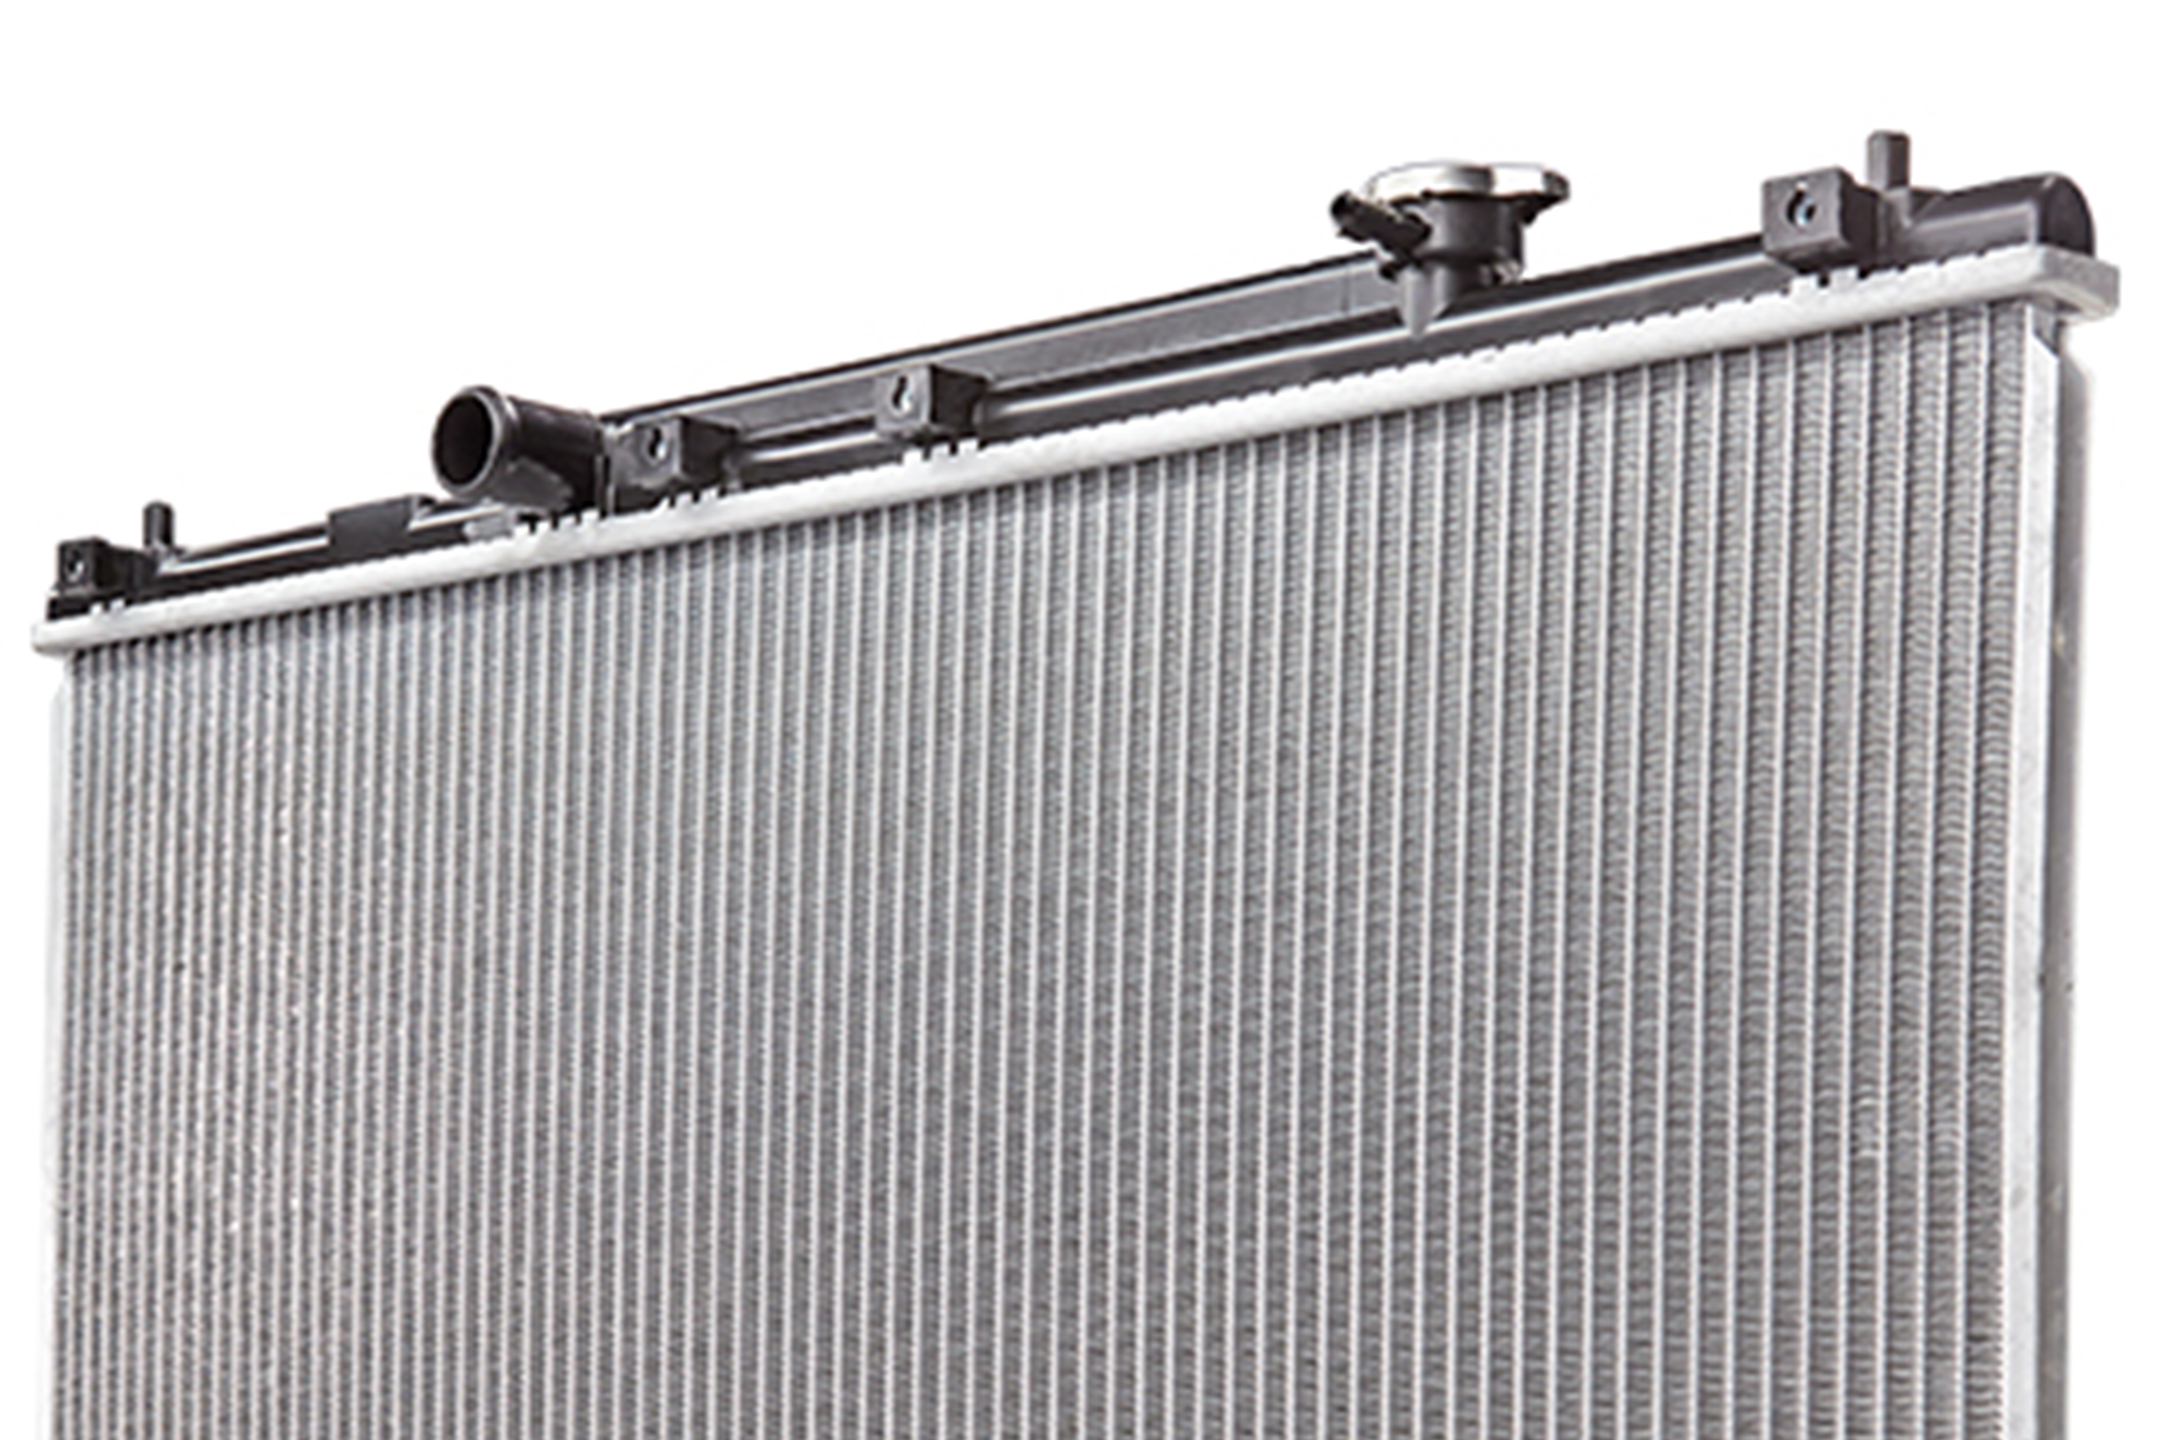
Radiators backed by Ford for non-Ford repairs.
Omnicraft™, the first new parts brand from Ford in over 50 years, offers premium replacement parts designed for non-Ford/Lincoln vehicles. Established in early 2017, Omnicraft currently offers the most common maintenance and light repair parts: oil filters, air filters, spark plugs, brake pads and rotors, loaded struts, starters, alternators and more.
Omnicraft continues to grow, with a parts lineup that is projected to reach approximately 40 product lines and more than 8,000 parts. The most recent addition is premium replacement radiators with 129 part numbers for Chevy, Ram, Hyundai and all other major brands on the road.
When combined with Motorcraft®, the Omnicraft line will provide radiator coverage for over 60-percent of all vehicles on the road in the United States.
Omnicraft radiators are put through rigorous quality assurance measures with each going through intense durability and corrosion testing, verified by performing a side-by-side evaluation between the original equipment radiator and the Omnicraft replacement.
The Omnicraft radiators are patented and designed for increased strength and optimal flow. Additionally, every radiator is leak-tested prior to packaging. Because of this intense testing and attention to detail, every Omnicraft radiator meets or exceeds the cooling performance of original equipment.
Importantly, Omnicraft radiators are backed by Ford, and include a limited lifetime /unlimited mileage warranty, labor included* with no commercial exceptions. This new line of radiators is now available where Ford and Motorcraft parts are sold.
*Limited labor costs. See your seller for a copy of the limited warranty.
Motorcraft® and Omnicraft™ are trademarks of Ford Motor Company.
-
Need New TPMS Sensors? Why Omnicraft™ Is a Smart Choice
As part of its expanding lineup of premium aftermarket parts, Omnicraft has introduced Tire Pressure Monitoring System (TPMS) sensors that fit most non-Ford/Lincoln vehicles on the road.
Low tire pressure decreases fuel economy and causes tires to wear out more quickly. A decrease of just five psi can cause a tire to fail, creating serious safety concerns.
The Omnicraft sensors are engineered to meet original equipment functionality, including auto-locate features, and have an easy-to-install snap-in stem. The system’s EZ-sensor is delivered “blank” and is programmable using any of the major TPMS programming devices.
For added convenience, Omnicraft sensors combine 314.9, 315 and 433 MHz applications into one unit and are engineered to support new and planned manufacturer technologies. They are also compliant with the TREAD act.
Omnicraft TPMS sensors are backed by a limited lifetime warranty with unlimited mileage,* labor included** and with no commercial exceptions.
TPMS sensors have an average battery life of eight years. However, depending on usage, they could fail anywhere between seven and 10 years. Technicians generally recommend TPMS sensor replacement any time a customer replaces tires within that period. This saves the customer money spent on labor and eliminates an extra trip to the shop. Omnicraft sensors make replacement quick and easy.
Omnicraft is the newest member of the Ford parts family, offering affordable, reliable parts for non-Ford/Lincoln vehicles. It joins Motorcraft® and Ford Parts to form the Ford Total Parts Lineup, which provides quality automotive components for most vehicle brands on the road.†
*See seller for limited warranty details. Defect only. Original purchaser and receipt required. Excludes towing.
Parts included. **Labor limited to two years. †Covers parts commonly replaced through normal maintenance.
Some model year restrictions apply. See your dealer for participation and details.
Motorcraft® is a registered trademark of Ford Motor Company. Omnicraft™ is a trademark of Ford Motor Company.
-
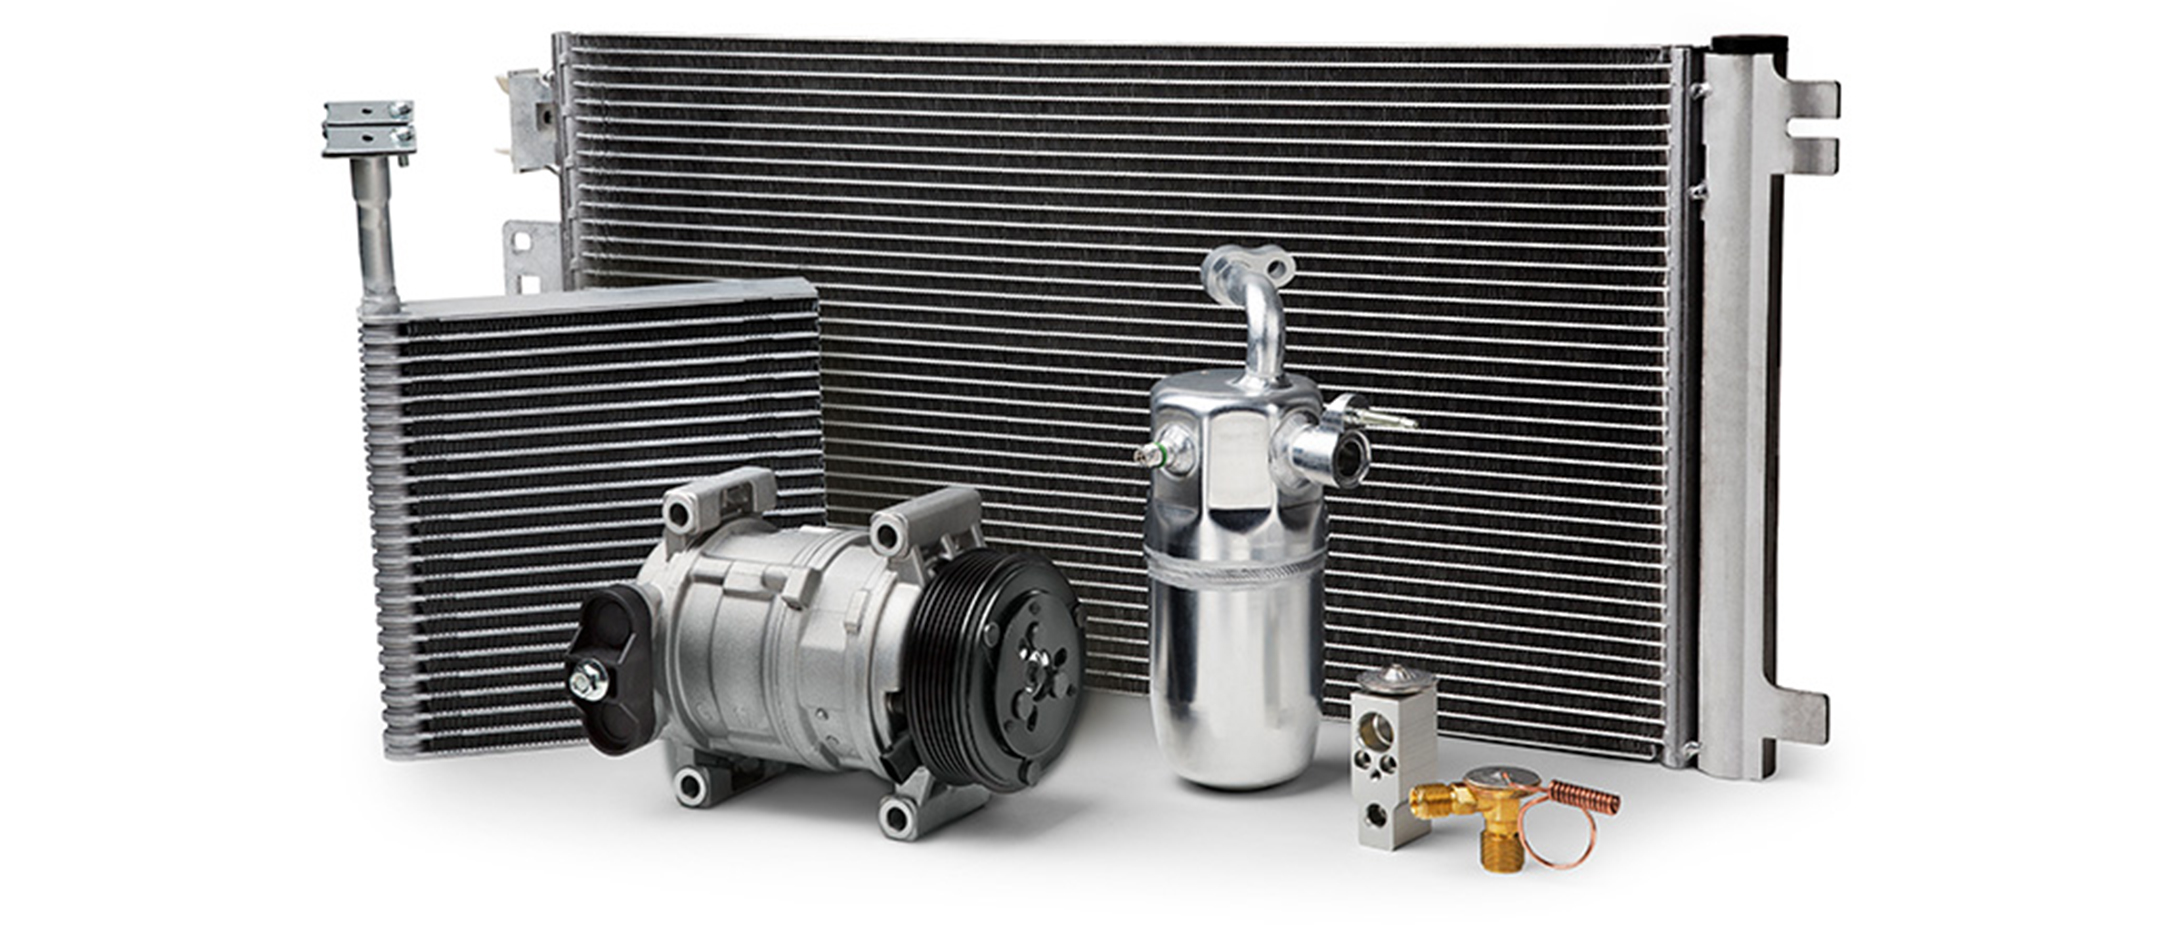
A smart choice for premium automotive A/C components
The origins of automotive air conditioning
Although automotive air conditioning wasn't available as an official manufacturer option until the release of the 1940 Packard, experimentation with automobile A/C occurred through most of the 1930s.
Early examples included the use of parts from a kitchen refrigerator, and you can imagine how much trunk space those took up. Needless to say, it took a while to get it right.
The fine points of automotive A/C systems have obviously been refined over the years, but surprisingly, the basic design and operation have remained largely the same. And, like any piece of hardworking machinery, components need to be replaced from time to time.
Here's where Omnicraft™ comes in. Omnicraft offers premium replacement parts that are backed by Ford but designed for non-Ford Motor Company vehicles.
Omnicraft offers a robust lineup of A/C parts, all designed and tested to provide long-life reliability and performance.
Compressors
- Includes latest design enhancements, including select models with control valves, for excellent performance and quiet operation in even the toughest conditions
- Increase from three to five pistons reinforces the center case and with improved center seal helps decrease leaks under harsh conditions
- Precision-designed using 3-D coordinate measuring to ensure a precise fit
- Manufactured from 100 percent all-new components
Condensers
- Designed to help maximize radiator airflow and maintain optimum engine-cooling capabilities
- Rugged pressure, vibration and damage resistance tests establish core integrity and surpass real-world driving conditions
- Engineering attention to core thickness, fin pitch and tube construction helps ensure optimum performance levels and helps keep the A/C running cold
Evaporators
- Lightweight space and weight-efficient design are package engineered to help provide optimum performance and a trouble-free installation
- Helium-tested to ensure structural integrity, resulting in the avoidance of leaks
- Surfaces designed to help maximize moisture runoff and also help prevent mold and odors
Accumulators and Driers
- Meets or exceeds manufacturer’s requirements in airtightness, anticorrosiveness, moisture absorption and more
- Welds are manufactured to remain leak-free and are leak-tested to help ensure reliable operation
- Desiccant is tested and assembled in a controlled environment and formulated to help absorb maximum refrigerant moisture
Smart Choice
Best of all, Omnicraft A/C components are competitively priced and include a limited lifetime warranty with unlimited mileage, labor included and no commercial exceptions.*
Along with A/C parts, the Omnicraft lineup also includes the most commonly requested parts for maintenance and light repairs — oil filters, brake pads and rotors, loaded struts, starters, alternators and more.
Look for Omnicraft parts wherever Ford and Motorcraft® parts are sold.
*Limited labor costs. See your seller for a copy of the limited warranty.
Motorcraft® and Omnicraft™ are trademarks of Ford Motor Company. -
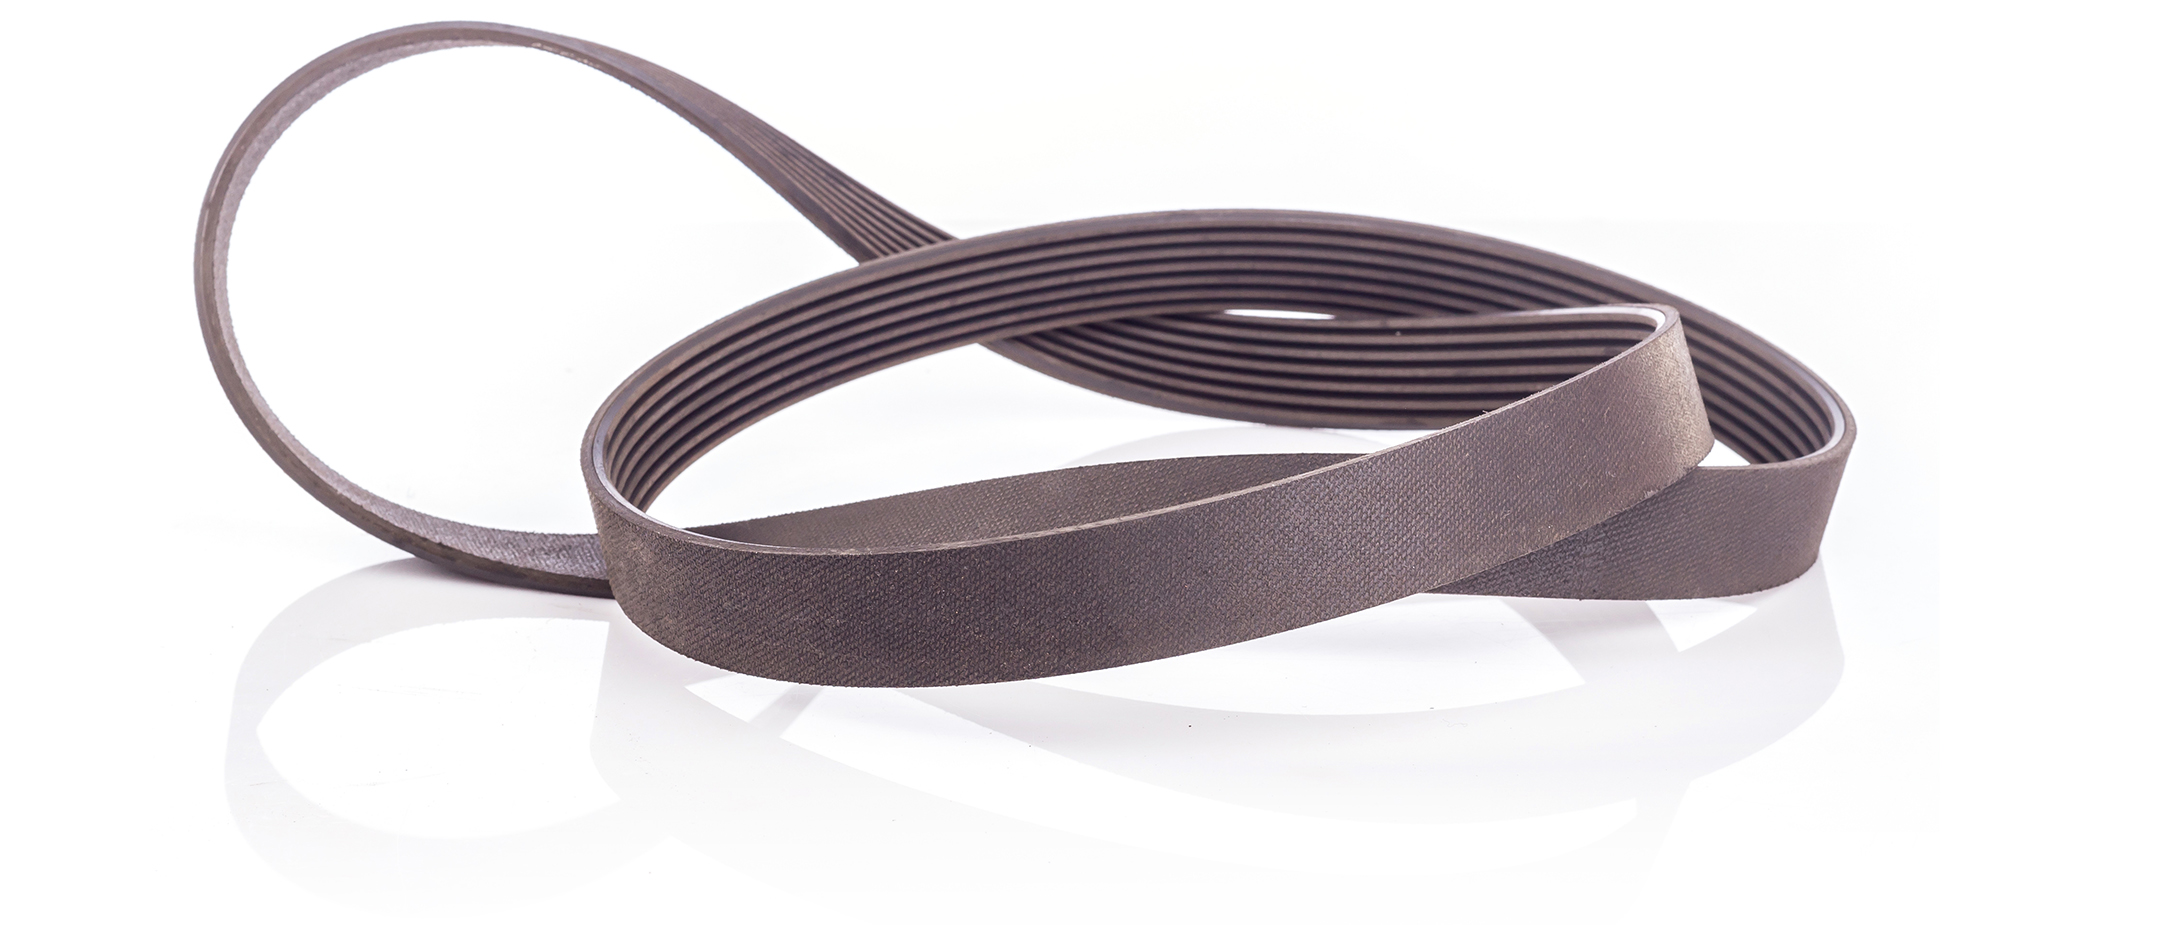
These serpentine belts will help keep your car running smoothly
Omnicraft™ is announcing the addition of serpentine belts to its lineup of premium parts built for non-Ford/Lincoln vehicles. With Omnicraft for non-Ford/Lincoln vehicles and Motorcraft® and Ford Parts for Ford and Lincoln vehicles, the Total Parts Lineup from Ford offers a solution for major brands on the road. Ford Motor Company has taken advantage of advancements in belt design to help ensure reliability and performance.
Here are more reasons why Omnicraft serpentine belts are a quality choice for most vehicle makes and models:
- Precise design to application-specific tolerances to help eliminate slipping and squealing
- State-of-the-art manufacturing processes to help provide reliable and consistent quality
- Use of advanced materials designed to help minimize noise, vibration and premature failure
- Smooth operation and a long service life thanks to advances in synthetic rubber technology
- Resists deterioration caused by grease, oil, dirt and high temperature
To help ensure you get the correct part, every Omnicraft replacement belt includes useful information encoded in the part number − the number of ribs, outside circumference, width and more are all clearly encoded and printed directly on the belt.And as always, the Omnicraft advantage means tough standards and rigorous tests to ensure quality, performance, durability and fit. Omnicraft serpentine belts are backed by a two-year warranty with unlimited mileage, labor included* and no commercial exceptions.
Omnicraft serpentine belts are now available from FordParts.com, as well as your local Ford dealer.
*Limited labor costs. See seller for limited warranty details. Defect only. Original purchaser and receipt required. Excludes towing. Parts included. Labor limited to 2 years.
Omnicraft™ is a trademark of Ford Motor Company. -
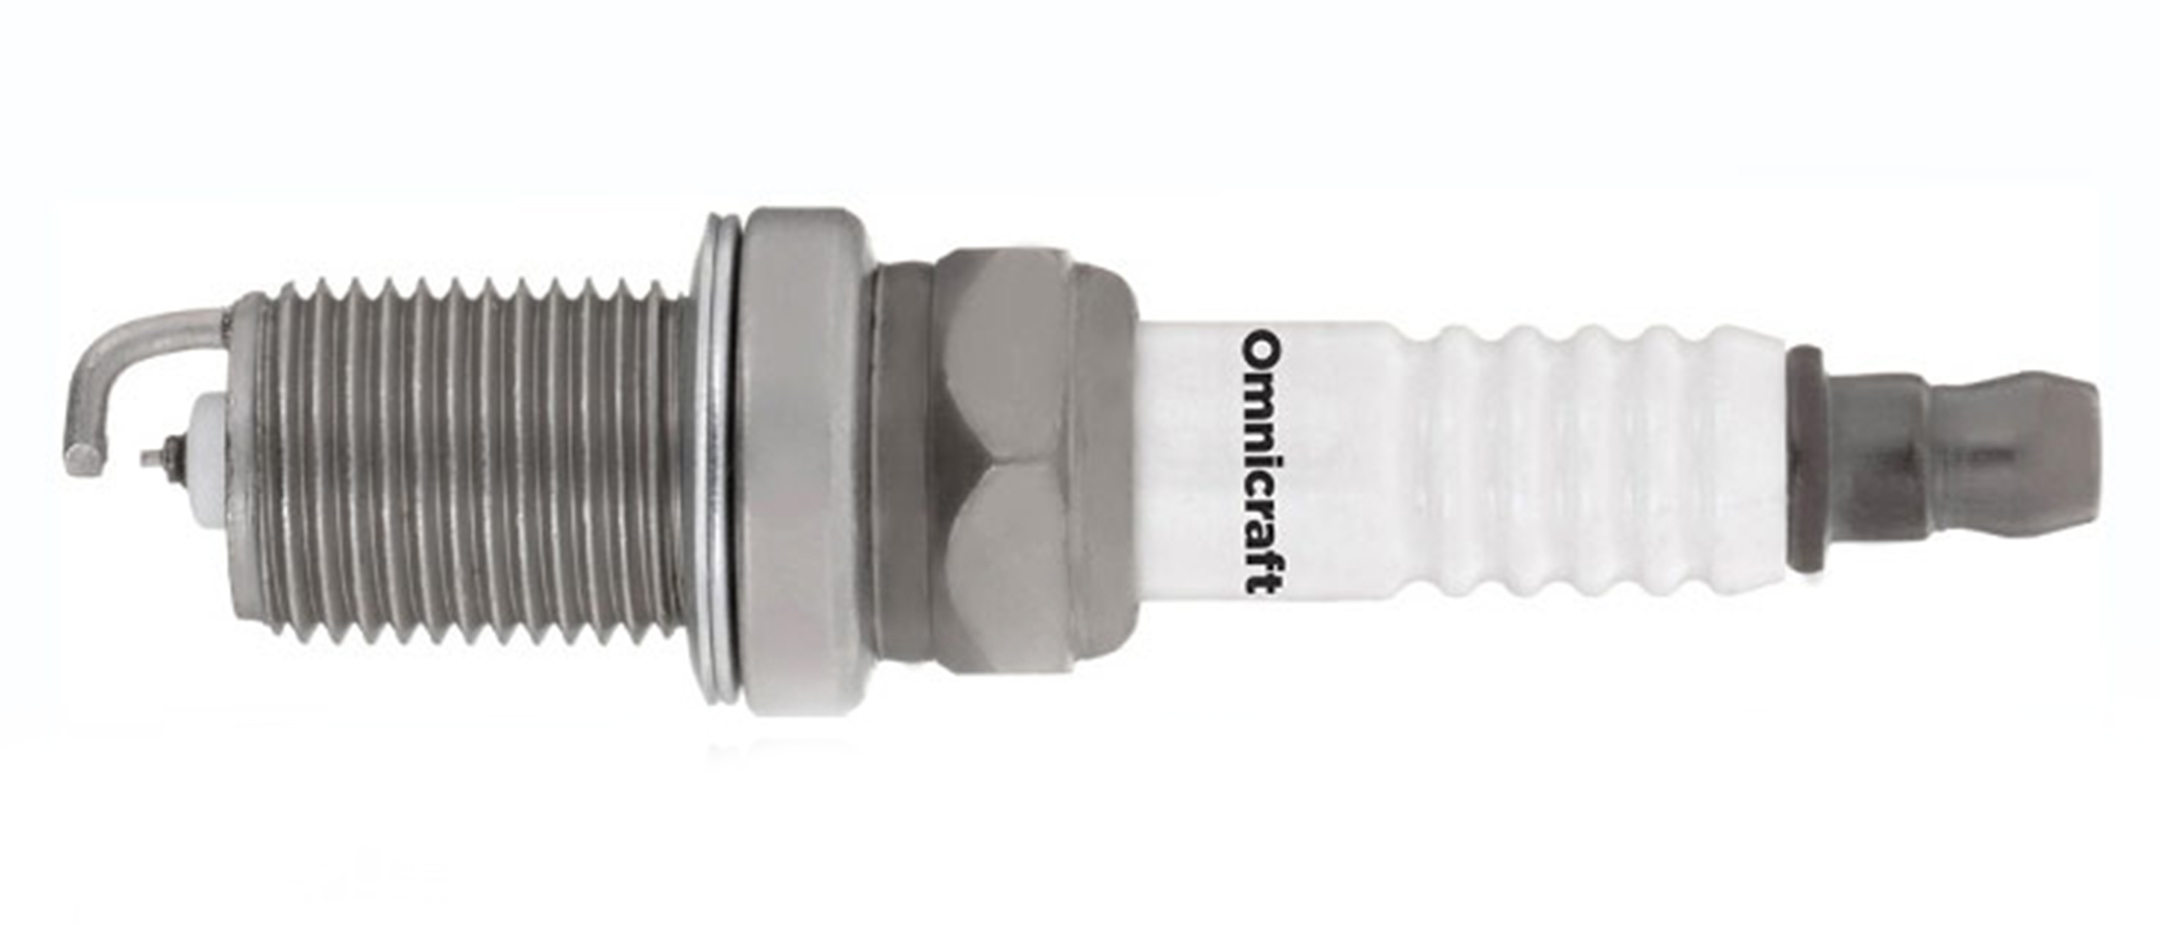
Get your engine off to a great start with Omnicraft™ spark plugs
Omnicraft has added precision-manufactured spark plugs to its growing line of premium parts for non-Ford/Lincoln vehicles.
"The new Omnicraft spark plugs will significantly broaden vehicle coverage," said Robert Boss, Ford North American Maintenance Manager, noting that Omnicraft and Motorcraft® spark plugs combined cover 70 percent of vehicles on the road today.
With spark plugs designed to last as long as 100,000 miles, owners sometimes forget about replacing them. However, there are some obvious symptoms when plugs are worn out, such as engine misfiring, difficult starting, higher fuel consumption, rough idle and lack of power. It is best to replace plugs before experiencing any of these problems.
Omnicraft iridium plugs help provide top efficiency and a long service life. The iridium-enhanced 0.6 mm fine-wire center electrode was designed to optimize durability and performance when compared with 0.8 mm fine-wire multi-electrode designs and standard plugs.
The multi-rib insulator helps protect against misfire, while an internal resistor minimizes electrical interference.
Other features of Omnicraft spark plugs:
- Patented platinum side-wire technology for maximum efficiency in most ignitions
- V-trimmed ground electrode for enhanced ignitability (compared with the average of other premium brands)
- Copper core for improved resistance to fouling
- Nickel-plated shell for corrosion resistance
- Application-specific designs
- Heat range determined by industry standard (SAE-J549) test specification
Like all Omnicraft parts, these spark plugs are approved and backed by Ford Motor Company. Our spark plugs are covered with a two-year limited warranty* with unlimited mileage, labor included and with no commercial exceptions.Omnicraft is the newest member of the Ford Parts family, offering affordable, reliable parts for non-Ford/Lincoln vehicles. It joins Motorcraft and Ford Parts to form the Ford Total Parts Lineup, which provides quality vehicle parts for all major brands on the road.**
*See seller for limited warranty details. Defect only. Original purchaser and receipt required.
Excludes towing. Parts included. Labor limited to two years and $150.
**Covers parts commonly replaced through normal maintenance. Some year restrictions apply. See your dealer for participation and details.
Motorcraft® and Omnicraft™ are registered trademarks of Ford Motor Company. -

MIG Plug Welds Secure A-Pillar, Windshield Installation
Replacing the A-pillar on a 2013 and later Ford Fusion can involve removing laser welds in the windshield flange area that interfere with removing the A-pillar. The new A-pillar must then be welded in the windshield flange area, and MIG plug welds can be substituted for the laser welds in this application, spaced roughly 25 mm between plug welds.
Begin the job by heating the offending laser welds and removing any trace of them, aggressively cleaning the metal surfaces to present bare metal surfaces where the MIG plug welds will be installed. Later-model A-pillars will have flanges added to allow good mounting to the vehicle, so drill or punch 7.5 to 8 mm holes in the bracket sheet of metal spaced about 25 mm to 40 mm apart, or ideally wherever the original spot weld was. After making sure everything is clean, clamp the flange sheet onto the body back sheet.
It is good to test weld two pieces of the same metal together away from the vehicle, before taking on the whole pillar, to make sure the test weld is sound and has penetrated through both sheets. Special clamps are available to hold the flanges' base metal together, with space in the middle for the torch to weld the plug weld. The rear face of these clamps is offset so it can fit over flanges. Hold the welding torch wire in the center of a hole (not at the edge of the hole and not at an angle) to avoid creating a weak weld that might not penetrate into the back sheet.
Begin welding in this upright position and keep the welder that way until the hole is almost full of weld. Then move the welder outward in ever-increasing circles until the plug weld is done. The MIG welding machine power should be the same as that used for most other welding, since the metal sheets are the same thickness.
This weld penetration is needed, where the molten pool is just breaking out of the reverse of the back sheet and both sheets are securely welded together.
Install correct windshield and relevant accessories
If installing or reinstalling the Fusion windshield, be aware that the windshield is a very important structural part of the vehicle, contributing to the strength of the roof and A-pillars, and safety of the driver and passengers in case of a collision. The windshield helps to manage collision energy and is an integral part of advanced safety systems and installing a replacement windshield mandates consideration of many factors.
Ford specifies that if any of the following conditions exist, the fixed glass originally in the vehicle must be discarded and a new fixed glass installed.
- The fixed glass is the windshield glass and equipped with a camera bracket.
- The fixed glass is the windshield glass and is equipped with adhesive moldings.
- The fixed glass is the windshield and equipped with an Advanced Head-Up Display (AHUD).
- The fixed glass is RIM encapsulated.
- If equipped with a Head-Up Display (HUD) projected on the windshield or a camera bracket, the replacement windshield must have locating pins and spacers to ensure proper alignment. With a head-up display, the windshield must be installed with specific gaps to the A-pillar and roof, as outlined in Ford/ Lincoln workshop manuals.
- If equipped with a forward-facing camera, it will need calibration.
- When installing, the replacement windshield should be supported by certain additives:
- Apply BETASEAL 43538 or equivalent body primer to damaged clear-coat areas that did not expose bare metal. Ford/Lincoln identifies BETASEAL 43538 or equivalent primer.
- Ford/Lincoln specifies Motorcraft® Ultra-Clear Spray Glass Cleaner/ZC-23 (ESR-M14P5-A) to clean the inside of the new fixed glass.
- Apply either of the following to the new fixed glass:
- Dow Urethane One Step Glass Primer/ BETAPRIME 5500/5500a/5500SA
- Sika Urethane Metal and Glass Primer/Sika 206 G+P
- Ford/Lincoln specifies BETASEAL Express Dow Urethane Adhesive and Sika Tack ASAP Urethane Adhesive
Motorcraft® is a registered trademark of Ford Motor Company.